If you want to add some personality to your clothing or accessories, embroidering is a great skill to have. There are a variety of different stitches you can use to create custom embroidery designs, and many embroidery machines allow for easy customization of the stitch patterns. In this tutorial, we will show you how to embroider custom designs on fabric using a hoop and a needle or an embroidery machine.
Types of Embroidery
There are many different types of embroidery and each has its own set of guidelines and requirements. Below is a brief overview of the most common types of embroidery and some of the specific guidelines that apply to them.
Bust Embroidery: This type of embroidery is used to add decoration to clothing or accessories. The guidelines for bust embroidery vary depending on the design but often involve using a lot of small stitches and close observation of the fabric.
This type of embroidery is used to add decoration to clothing or accessories. The guidelines for bust embroidery vary depending on the design but often involve using a lot of small stitches and close observation of the fabric. Cross-Stitch: Cross-stitch is a type of embroidery that uses tiny stitches to create a picture on fabric. It’s often used for monograms, initials, or borders on quilts or other items.
Cross-stitch is a type of embroidery that uses tiny stitches to create a picture on fabric. It’s often used for monograms, initials, or borders on quilts or other items.
French Knotting: French knotting is a type of embroidery that uses small, knot-like stitches to create a design. It’s often used for delicate designs or for adding texture to fabrics.
Hand embroidery is a type of embroidery that can be done with just your hands. It’s popular for creating delicate designs or textures on fabric. Machine Embroidery: Machine embroidery is a type of embroidery that is done with a machine. The machine stitches the design onto the fabric and can produce very realistic results.
Machine embroidery is a type of embroidery that is done with a machine. The machine stitches the design onto the fabric and can produce very realistic results. This machine embroidery makes it possible to create custom embroidery designs.
Screen Printing: Screen printing is a type of embroidery that uses fine dots or lines to create patterns on fabric.
Types of Threads and Embroidery Needles
Embroidery needles come in a variety of shapes and sizes, so it’s important to know what type of thread you’ll need to use with each one. The following are the three most common types of embroidery threads that are necessary to create custom embroidery designs.
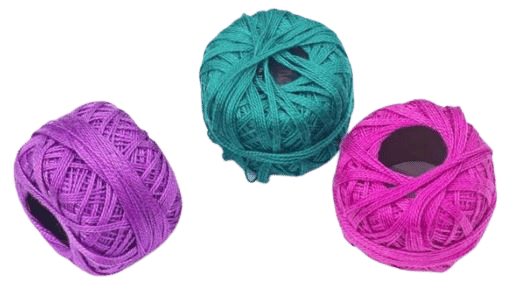
Fine (also known as Arty) Thread: Used for delicate stitches and detailed designs. Best suited for cotton, wool, and silk fabrics.
Medium (or Universal) Thread: Suitable for most fabrics. Will create a more muted look, but can be used for more detailed stitching.
Coarse (or Working) Thread: Used for bulkier stitches and general work. Best suited for cotton, linen, and certain synthetics.
How to Embroider Custom Designs
There’s nothing more satisfying than stitching a custom design together from pieces of fabric! In this post, we’ll show you how to embroider a custom design using a hoop and thread.
To get started, choose your fabric and design. We’ve provided some examples below.
1. Decide your hoop size and height: Figure out the size of the hoop that will fit comfortably on your machine’s embroidery frame or hoop arm. Hoops come in different heights, so make sure to find one that will fit the space on your embroidery frame correctly.
2. Determine the dimensions of your design: For our examples, we used an 8×10 inch hoop and a 4-inch height for the characters. However, these dimensions may vary depending on the size of your design and embroidery hoop. The important thing is that you make sure the dimensions are large enough to fit in your hoop without any cropping or trimming required! If you’re not sure of the dimensions, measure out your design on paper first and then use that as a guide when stitching it onto fabric.
3. Choose thread colors: We used DMC embroidery thread in our examples. However, any brand of thread will work just fine.
4. iron your fabric if necessary: Make sure your fabric is smooth, free of wrinkles, and doesn’t have any creases in it. This will help the hoop sit correctly on your machine and prevent any stitches from being pulled out or distorted.
5. Fit your fabric into the hoop: If you’re using a hoop that’s pre-drilled for mounting, just slip the fabric inside the hoop and line up the bottom of the fabric with the bottom of the hoop frame. If you’re using a hoop that’s not pre-drilled, you’ll need to fit the fabric into the hoop by hand and then line up the bottom of the fabric with the top of the hoop’s frame. You can do this by stretching or pinning it into place until it fits snugly. Try not to stretch or pull on the fabric while fitting it into the hoop – this could cause stitches to miss or be pulled out later on in the embroidery process.
6. Start stitching: We recommend starting with a small section of your design to get an idea of how everything goes together – this way, you won’t end up ruining any stitches before you even start embroidering! Once you have a rough idea of how the stitches are going, you can move on to the whole design.
7. Stitch your design: Start by stitching the bottom left-hand corner of your design first, and then work your way around the hoop. Make sure to backstitch at the beginning and end of each stitch to help prevent them from coming undone later on.
8. Trim your design: if necessary. If your design is larger than the embroidery hoop, it may be necessary to trim it down so that it fits properly within the hoop. You can do this by using fabric scissors or a seam ripper, depending on the type of fabric you’re using. Just be sure to keep track of where you’ve cut down each piece so that you don’t end up with any mistakes later on!
9. Finishing touches: Once your design is finished and stitched, it’s time to finish it off with some finishing touches. We recommend adding a border around the edge of your design if desired. You can also add embellishments like beads or sequins if desired. Just be sure to keep track.
Tips for Successful Embroidery Output
Embroidery is a great way to add a personal touch to your clothing and accessories. Here are some tips for success:
1) Choose the right fabric. Embroidery on synthetic fabrics may be difficult to see, but it can still be done. On cotton fabrics, embroidery can add a nice touch of texture.
2) Choose the right stitches. Many embroidery stitches are available online or at a fabric store. Some popular stitches include cross-stitch, backstitch, French knotting, and matting.
3) Prep the fabric well. Before you start embroidering, make sure the fabric is clean and free of wrinkles or creases. This will make stitching much easier.
4) Get started! Embroidering can be tricky at first, but with practice, it becomes easier and more fun. Have fun experimenting with different stitches and designs!
Conclusion
Embroidering custom designs on fabric can be a fun and rewarding experience, but it’s important to take the time to learn how to do it correctly. In this article, we had teach you the basics of embroidery so that you can start stitching amazing patterns onto your clothes without any trouble. We hope that these tips had helped make embroidery a part of your creative repertoire and that you’ll enjoy using it to add some extra dimension to your wardrobe items.