How to Thread a Sewing Machine
Threading a sewing machine can be frustrating and challenging if you don’t know too much about sewing machines. This blog post will show you how to thread a sewing machine through a step-by-step guide with images illustrating the threading process.
Threading a sewing machine is not as easy as it may seem, and it’s essential to know the correct threading pattern and how to thread each thread tensioner on your sewing machine. Sewing machines are complicated pieces of machinery, but threading them correctly will make all the difference in getting your project done faster or struggling with frustration.
There are many different threading methods for various sewing machines. It can be time-consuming to figure out which threading method is best for you, but the following guide will help make threading your sewing machine a breeze.
Let’s start it step-by-step from here.
Winding the Bobbin
The sewing machine has two sources of thread – the spool that sits on top and a bobbin that comes up from below. Bobbins already come empty while the spools of thread you buy! Before you can thread it, start a sewing machine all ready for action. You need to bring some of your chosen thread from the spool and on a bobbin!
A spool of thread can be placed onto a pin in any direction. These spool pins are responsible for securing the thread and can be found sticking up or down depending if it has some plastic covering that holds onto its position when not in use. The thread should come from the back to the left if the spool pin is sticking or from top to back if it is on its side.
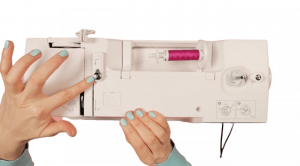
Open a few inches of thread, pull it to the left and wrap it in front of a little nubbin attached to your machine.
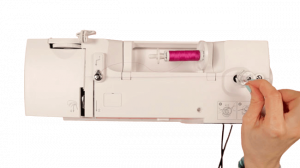
Thread a little up through the tiny hole in the top of your bobbin and wrap it around sometimes so that there’s unraveling all back towards where you want to go. Place this onto its winder, which is next right on our side, or if not secure, then flick away with one prong at any given time while turning clockwise until secured!
When you pull out the handwheel on many sewing machines, one can wind their bobbin without needing a needle going up and down. However, this isn’t necessary in some cases because flicking or angling towards an exposed stopper will enable them to do so instead.
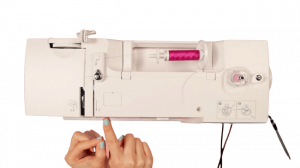
When winding your machine, make sure that the thread is wound onto a bobbin and not on top of it. To do this, hold down the pedal for about 3 seconds until you see two hands holding up an empty spool with one hand underneath to prevent any accidents from happening (or just don’t let go). When first switching over from sewing mode, if ends are sticking out on either side, gently push them back into place, so they’re flush against each other before continuing as usual. Otherwise, when finished filling all 4 bobbins, these pieces will stick outward, difficult/impossible.
Now you’ll need to snip the thread to separate the spool and bobbin before flicking your machine’s winder over to remove it. Now turn off just in case you end up sewing with a hand-made by accident!
Threading the Spool
Now we will thread the spool from top to bottom.
The thread should start coming out from behind the spool and to your left. First things first – unscrew all those little silver tension discs; they’re just for winding up threads, so don’t leave them on if you accidentally do this! On some machines, there may be hooks where your line needs to go around; make sure that’s clear before starting stitching by looking at its manual carefully (or asking someone!).
Now you need to guide the thread down to your needle – if arrows are directing this, it can’t go wrong. Guide them left from where they start at the first hook and follow through with a downward motion into the first ditch before moving up towards the second one on its right side again; next, move back over the top of the eye notch for good measure.
At the top of your needle, there will be one or two hooks (check with your sewing machine manual). Insert the end into these points and secure it in place behind them.
Threading the Needle
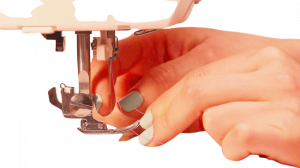
Now you can thread the needle from front to back. Make sure that your threads are not twisted around it, and if there is a bent-down position for where this will go, turn on that handwheel, so everything goes easier.
Threading the Bobbin
There are two types of threading options for sewing machines. A “front-loading system” has the bobbin in front, while a top-loading system has it placed at the back and bottom-loading models have them on top. Let’s explore both!
Front-Loading Bobbin System
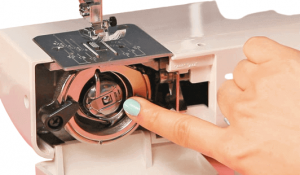
The front-loading machine I’m showing you here has a unique design. Flip down the cover on it, remove the arm, and then pull out your bobbin case with some silverware inside!
With this machine, you hold the bobbin so that it’s unwinding in a clockwise direction. However, check your manual to see if it is different on your model because dropping down and then up could cause some problems!
Once you have pulled a few inches of thread down the tiny slit and out through its side, place it back in the machine.
Front-Loading Bobbin System
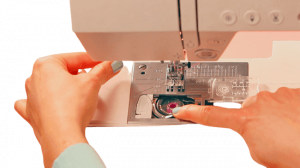
Top-loading machines have a bobbin case that’s fixed right in front of the needle plate. To take off this plastic cover, flick it with your finger so you can see how things are done from above, and then hold onto the thread coming out if they’re going clockwise as shown here (hold up little card). Plop them into place ready before pushing down on the top part as we did for our first time.
There’s a bit of groove at the front of this bobbin case to make threading easier. Just pull it through, and off your left!
Surfacing the Thread
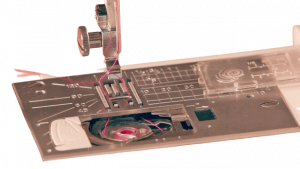
The final step is to surface the thread with the machine’s surface, using a spool thread. Rotate the handwheel with your right hand to turn the needle up and down while holding the spool thread in your left hand. Now gently pull the top thread with your left hand and a loop of bobbin thread emerges on the surface with it pull out this loop of thread.
Final Verdict
I hope you learned how to thread a sewing machine and can now confidently start your next project. We must take the time to learn these skills because they will empower us in our lives and everyday tasks! You’ll be glad you did, so head on over for more information about other things like this!